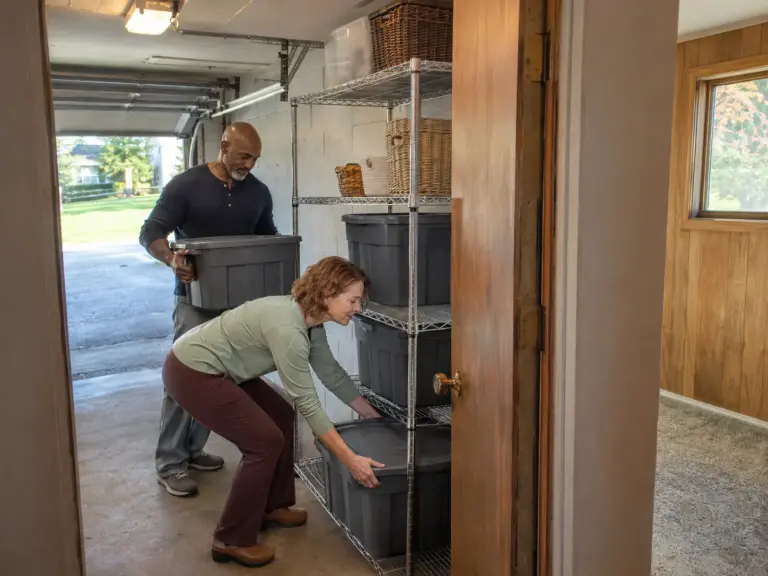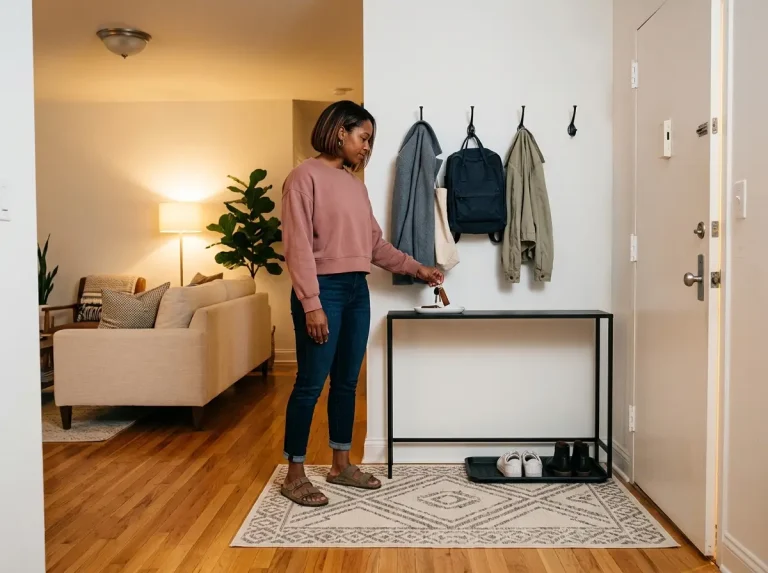

The lease says no holes, and the white wall across from the sofa is exactly where the hooks, the shelf and the framed print were supposed to go. Rental-friendly organization (renter-friendly storage, no-drill storage, damage-free storage, whatever the search box calls it) is not one trick. It is a set of rules about what each fix leaves behind, because every piece of removable storage holds by adhesive, pressure, friction or gravity, and each of those lets go differently. This guide sorts eight fixes into three families (the ones that touch the wall, the ones that press on a frame, the ones that touch nothing), then gives the rules that pick the right one for your wall, your door and your budget, and ends at the move-out.
If the whole apartment is tight, the small apartment guide covers the room-by-room layout, and this page covers what the lease lets you do to each surface.
Quick Answer
Rental-friendly organization means storage the lease allows and the surface can hold, removed at move-out without taking paint along. Sort every fix into one of three families: it touches the wall (adhesive), presses on a frame (rods, doors), or touches nothing (floor-standing). The less it touches, the less you repair.
Rental-Friendly Organization Starts With Adhesive Mounts and Their Weak Spot
Pull an adhesive hook off a painted wall and a coin of paint often comes with it, which looks like the glue’s fault and usually is not. The mount holds the paint more than it holds the wall, so the weak layer is the paint, and a cheap or fresh coat gives way first. That one fact explains most of the horror stories and most of the fixes.

What an adhesive mount holds, and what it holds onto
Think of a stack: wall, primer, paint, adhesive, hook. The adhesive can be stronger than the paint’s grip on the wall, and then the wall loses. The cheap white a landlord keeps on hand is the coat to be most careful with. Removable wall hooks, Command hooks included, promise no damage, and the stack decides whether that promise holds.
The hook goes up in the same place nearly every renter reaches for first, beside the front door, and a row of them is the usual start of a hook and mail spot by the entry door in a lease that bans screws.
For that wall, the Black Metal Adhesive Wall Hooks come as a six-pack with no drill needed, which suits a row of coats and totes. The pack’s hook size and rated weight are on the listing, so read both before you commit a heavy bag to it; the load section further down shows how to compare that number with what you actually hang.
Pull down, not out: the removal rule
Removal is where paint is saved or lost. The strip’s tab slides straight down, parallel to the wall, stretching the adhesive until it lets go. Pulling it out toward you peels the strip away from the wall at an angle, and that is the pull that lifts paint.
Warm the strip first. A hair dryer on a low setting for a few seconds softens the adhesive, so it stretches instead of tearing the paint. Go slowly, because a strip pulled fast is the one that takes the chip.
If a spot of paint does lift, skip repainting the wall. Take a chip to a paint counter, have the color matched, fill the spot and touch it up. A small patch costs far less than a wall and blends better than most people expect.
The time-on-the-wall problem
Duration is the second half of the failure. The longer a strip stays up, the harder it comes off, so a hook that survives one week is no proof it will come off clean after a long lease. Walls covered in strips for years have come through a move-out with a single chip, and the chip came from one strip pulled too fast, so patience at removal does most of the work.
The same logic points to the free option: anything you can do without a sticker leaves nothing to remove. A desk setup that uses no adhesive at all is the model, and a leaning shelf or a floor-standing cart is the same idea at larger scale.
Wall-Surface Systems That Sit on the Wall Without Going Into It
A shelf in a place where a screw is forbidden is the request that sells the most stickers. Adhesive ledges, magnetic strips, pegboards and wall grids all promise a wall shelf without the hole, a drill-free, tools-free job, and each one deserves the same question before it goes up.

Adhesive ledges and floating-look shelves
An adhesive shelf is a hook spread over a bigger face. More area means more paint to take with it, and the load rides forward of the wall instead of straight down, which pulls at the top edge of the mount. A flush ledge suits light, small things, such as a planter or a row of postcards. If the shelf has to carry books, a floor-standing unit, the real floating shelf alternative, does that job better, and the freestanding section further on covers it.
The LAIGOO adhesive floating shelves are a set of three made for walls where nothing can be drilled, and they are the kind of ledge this section describes. This is a stock that sells down, so if the listing has gone, the same job is done by a shelf leaning on the wall or by a small unit on the floor. Vertical storage in an apartment works with any of them.
Magnetic strips, pegboards and wall grids
A magnetic bar for knives and metal tools, a pegboard and a wall grid are the familiar versions, and the fixing method decides whether any of them is rental-friendly at all. A pegboard screwed into studs is a hole. The same pegboard leaning against a wall, or an adhesive-mounted strip, touches the wall only the way a sticker does. Read how a system is fixed before you read what it holds.
A rated load on one pack tells you nothing about your wall, so read the figure on the product you actually buy. What carries over is the mechanism: mounts that spread the load across a larger area lift more paint if they let go.
The question to ask before any of them goes up
One question works on every item in this guide: if I take this off in a year, what does it leave? A hook leaves a faint ring at worst. A shelf leaves four corners and an edge. A wall grid leaves a lot of surface to touch up.
Run the question on each item, in that order, and the choice mostly makes itself.
Tension Rods: Pressure Is the Only Thing Holding Them Up
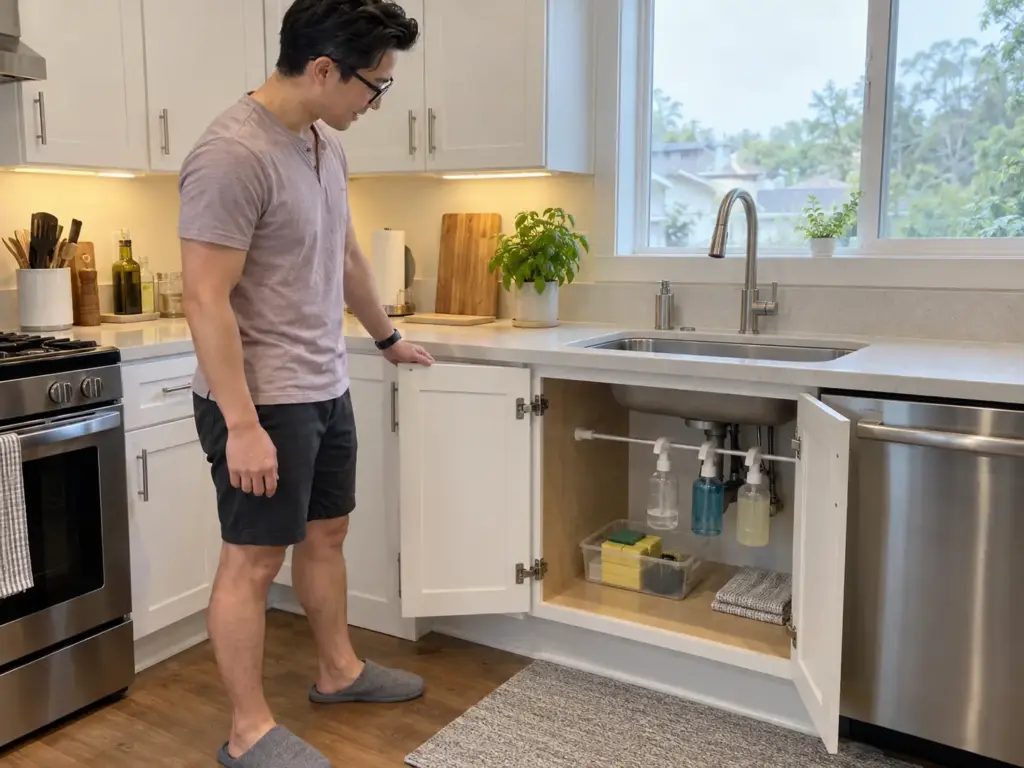
A rod loaded with spray bottles holds fine for a week and then drops one night, which makes it look unreliable when it is only behaving like what it is. A tension rod holds by pressure against two faces and friction at the ends. There is no screw, no glue and no hook, so the load is limited by the grip and by the faces: smooth, rigid and parallel work, anything else loosens it. Tension rod storage, from a rod across a cabinet to a tension pole running floor to ceiling, follows that one rule.
Under the sink and inside cabinets
This is where a rod earns its place. The two sides of a cabinet are rigid and close together, so a rod spans them without strain, and a bar of spray bottles hung over it frees the floor of a cramped base cabinet. Keep it to light things. A kitchen cabinet set up for a rental uses a rod for exactly this and leaves the walls alone.
Under-sink storage is the best case for a rod, and a pedestal sink organizer in a bathroom or a pan lid holder inside a kitchen cabinet door follows the same rule: it hangs, hooks or stands, and nothing is screwed in.
A spare curtain rod from the closet shelf is worth trying first. Cut to the cabinet width, it does the same job at no cost.
Closets, windows and the gap between two walls
Across a closet or a window frame the faces are less obliging. Drywall flexes under the push, a laminate side is slick, and a gap that is not truly parallel lets one end creep. A rod that held fine on day one can ease downward as the wall takes the strain. For longer spans, the rod only suits things that weigh little, such as a row of scarves or a lightweight curtain.
The Home in Bold tension rod shelving builds a shelf onto the rod, which turns a bar into a surface for small items under a sink or inside a cabinet. It is adjustable storage that expands to fit, so measure the opening first and read the listed range against it; neither width nor load is something to assume.
Why a rod comes down
A rod drops when one of three conditions shifts: the faces flex, the surface is too smooth to grip, or the load is hung off-center and twists it. Those are also the checks that prevent it. Press on both walls to feel whether they give, wipe a slick surface so the ends bite, and hang heavy items near the middle of the span, never at one end. For a deeper treatment of the tool, see shelving built on a tension rod.
Over-the-Door Organizers and the Thickness Problem
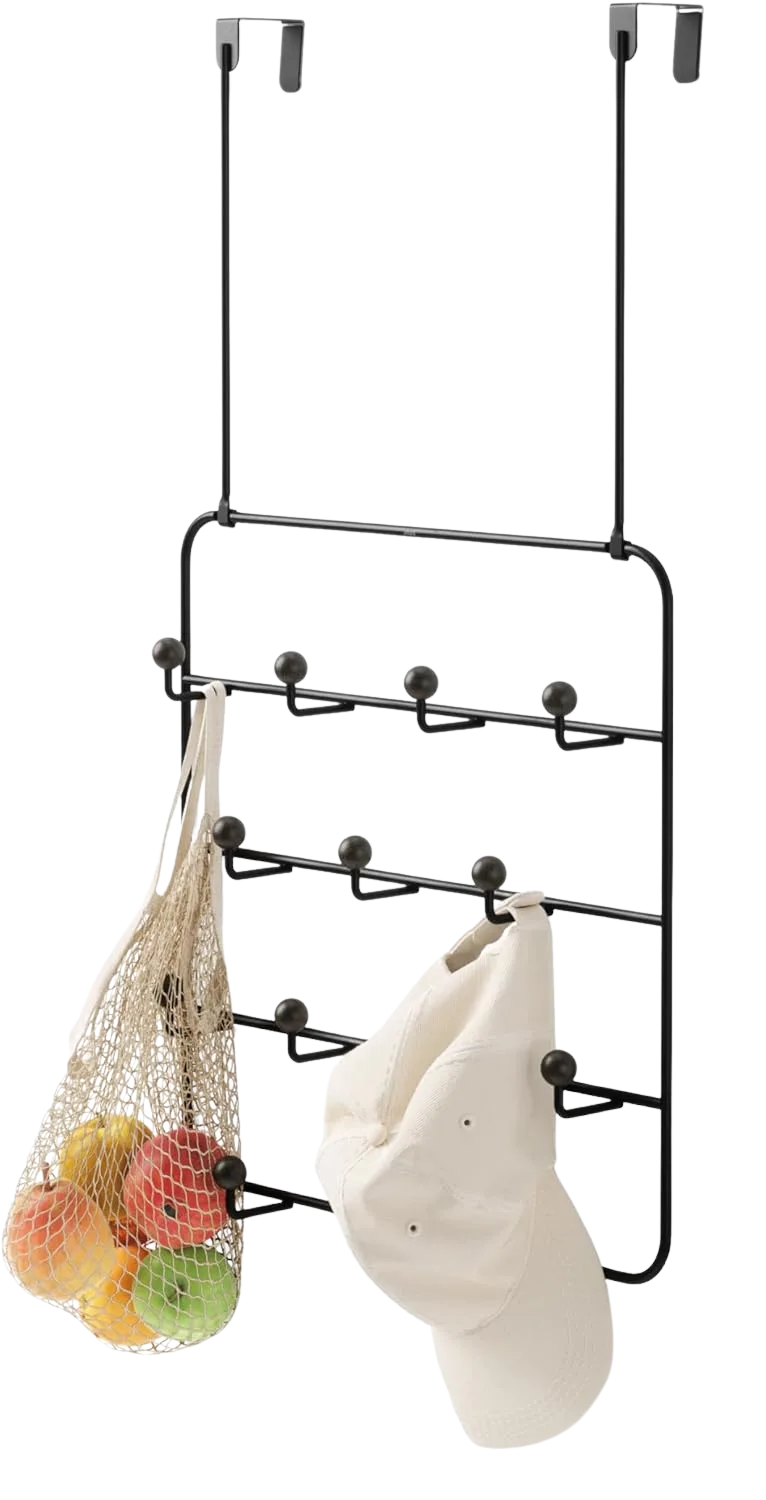
The hooks look right, the pockets are filled, and then the door will not close. An over-door organizer rents the edge of a door: it hooks over the top, rests against the face, and the thickness of the door decides whether the hooks sit down or the door fails to latch.

What an over-door organizer needs from the door
The organizer needs a flat top edge, enough clearance on the far side and a thickness it was built for. A set of hooks designed for a thinner door will pinch a thicker one, and a pocket organizer has no tolerance at all. Doors in a rental are not always standard, so the tape measure comes before the cart.
Over-door storage and the cabinet door organizer that hangs inside a kitchen door share the same hook-over-the-edge design, so the thickness rule covers both. A comparison of over-door organizers that fit your door helps once the thickness is known.
The hollow-core door and the hinge side
Most apartment doors are hollow-core, a thin skin over a light frame. A loaded organizer pulls on the top edge, and the skin there is the part that has to take it. Hang near the hinge side, where the door is held more rigidly, and keep the loaded pockets low, because weight at the top levers harder on that edge. Check the far side too: a door that has to swing past a wall stop or a closer needs clearance, and a thick organizer can stop it early.
What to hang and what to leave off
Light and flat belongs on a door: scarves, belts, a dust mop, a few totes. Heavy does not, and the heaviest thing most people hang is shoes. Over-door shoe storage works when the pairs are light and the door is sound, and it is the first thing to take off if the door starts to bow. A hook resting on the top edge of the door, already in a drawer somewhere, is the free first step before any organizer.
Rolling and Slim Carts for the Gaps Nothing Else Fits
The narrow gap beside the refrigerator is a recurring problem because nothing sold for a kitchen was made for it. A slim cart is storage on wheels, so it touches neither the wall nor the lease, and it pulls out when the gap is needed for something else.

The gap beside the refrigerator or the washer
Measure the gap itself, then the clearance past it. A cart that fits the opening still needs room to roll out, and a door that opens into its path or a baseboard heater beside it changes the answer. Measure at the narrowest point, at floor level and at the height of the top tier, because walls are rarely plumb in older buildings.
The slim three-tier rolling cart is sold at roughly seven inches wide. Treat that as a number to confirm: read the width on the listing against your gap before you count on it.
What goes on a cart and what it needs under it
Cans, spices, cleaning supplies, small bottles. A cart in a kitchen is a pantry that rolls, and a pantry in a small apartment kitchen usually has more to gain from a cart than from another shelf. The floor matters: a cart on a soft rug sinks into the pile and drags, while one on vinyl plank rolls freely.
Why a cart creeps
Wheels roll, so the cart drifts toward the gap’s open edge and gets nudged back every few days. And a narrow cart loaded high tips, so heavy items go on the bottom tier and the light ones on top. Where the gap is wide enough for a stool, a shoe box on a shelf does the same job with no purchase at all.
Baskets and Bins Are the Storage; Shelves Are Just Where They Sit
Builder-grade shelves are not yours to change, so the container has to carry the system. Bins and baskets, a cube organizer included, are the working part of a rental shelf: the bin sets the size of what is stored, and the shelf just needs to hold it. Start from the container and the shelf question mostly answers itself.

Why the container matters more than the shelf
A shelf that is wrong for the bin is a nuisance. But a bin that is wrong for the shelf is a daily problem, because it blocks a door, sticks out past the frame or wastes the top of the shelf. Measure the opening, then the depth, then pick the container, in that order. Shoe boxes work as the first draft of a system and cost nothing.
Clear, woven or soft: what each does to a rental shelf
Clear bins show contents and make a shelf legible. Woven baskets hide the contents and soften a room, which suits a shelf in a living room. Soft bins are collapsible storage that fold flat when you move, and stackable bins use the height above the shelf.
For a rental, the practical sorting is by what each one does: fits, hides or moves. For a closer comparison of clear bins that suit rental shelves, that guide goes through the formats.
Labels without sticking anything to the wall
Put the label on the bin, never on the shelf or the wall behind it. A label on a bin travels with the bin when you leave, and the shelf stays as you found it. A small reusable card in a bin’s holder, or a strip of paper tape on the container, does the job and peels off cleanly.
Freestanding and Leaning Shelves in Place of Floating Ones
The wall cannot take a shelf, so the floor takes it. Freestanding shelving stands on the floor and the wall carries nothing. The price is floor space and a stable base.
Leaning ladder shelves and freestanding units
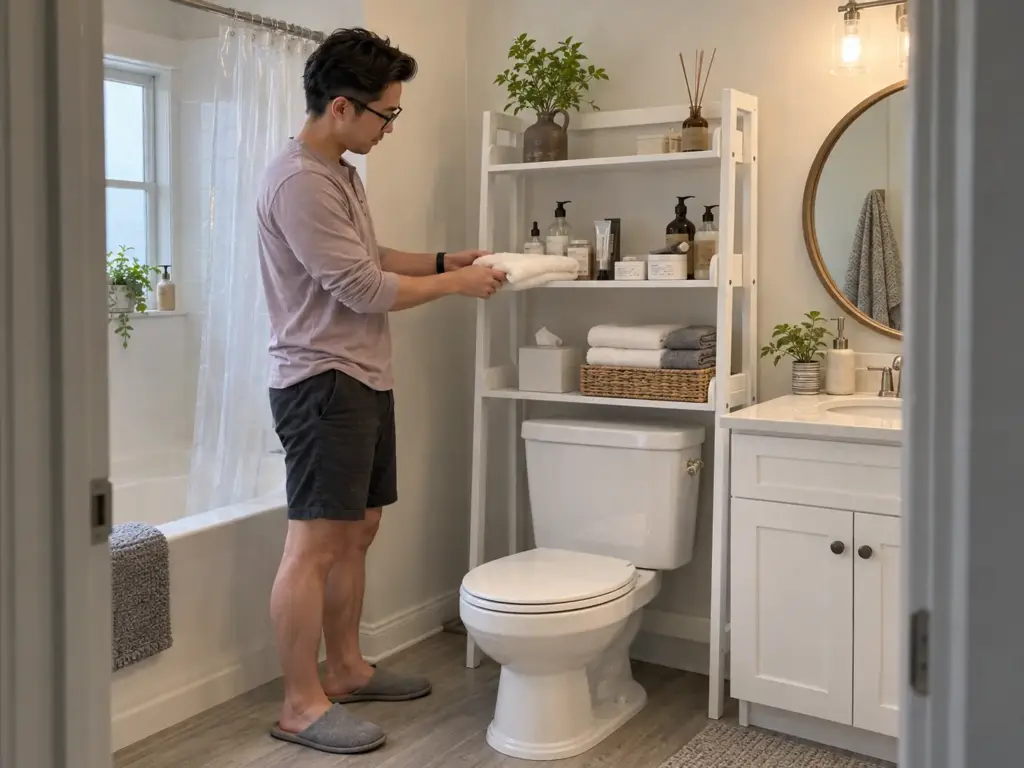
A leaning shelf, the original no-nail shelf, rests against the wall at an angle and touches it only along the top edge, so it marks the paint only if that top rubs. A strip of felt on the contact edge removes even that. A freestanding bookcase needs a level floor and, when tall, the heaviest things low, because a unit loaded at the top is the one that tips. A bookcase from the other room is the free first answer; a second one is the budget answer after that.
The over-toilet shelf as a freestanding case
In a bathroom the same idea takes the form of a shelf that straddles the toilet. It stands on the floor on either side of the tank, so there is nothing to drill and nothing to repair.
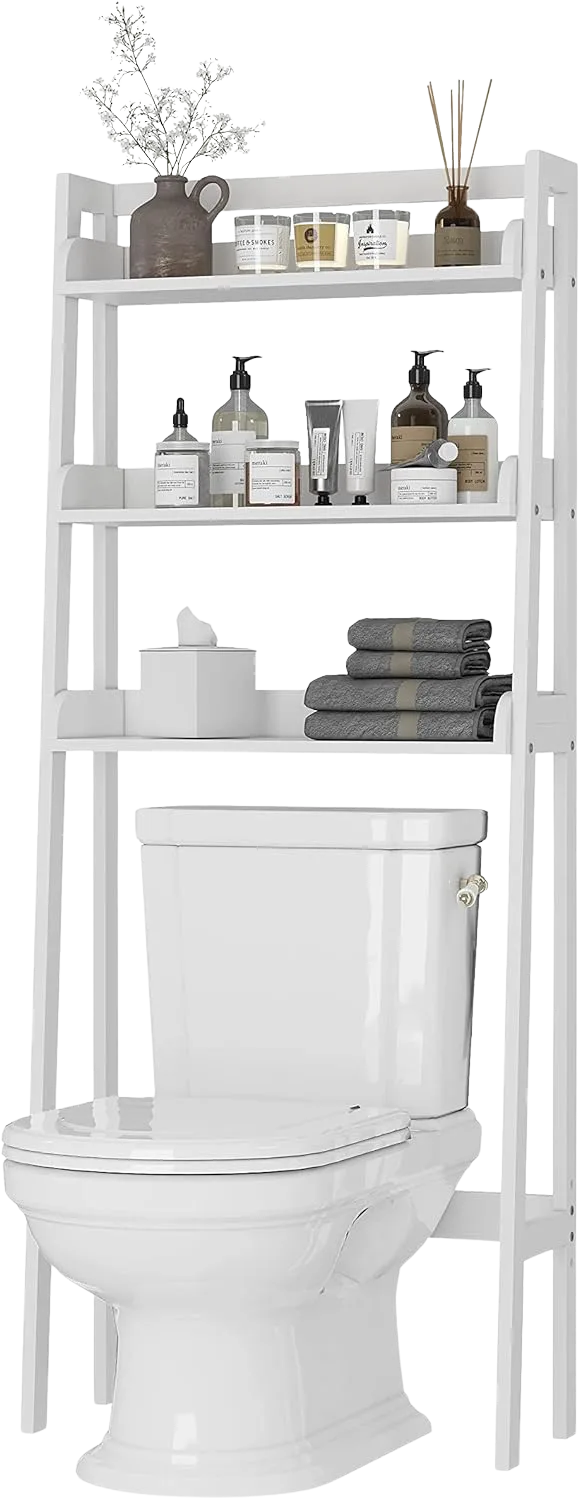
The rest of the room is covered in bathroom storage ideas for renters, where this shelf is one piece of a bathroom that has to stay deposit-safe.
What a leaning shelf does to the wall behind it
At rest, almost nothing. The risk is rubbing: a shelf pushed up against the wall every day wears a mark where the top edge touches, and a shelf dragged across the floor scuffs the paint when it moves. Felt pads at the contact points and a gentle lift when you shift it are the whole defense.
Under-Bed Storage and Risers: Using the Floor Under You
A bed sitting low on the floor leaves a gap too small to use, and that is most of a room’s dead space. Under-bed storage needs height, so measure the clearance under the frame before choosing a bin.
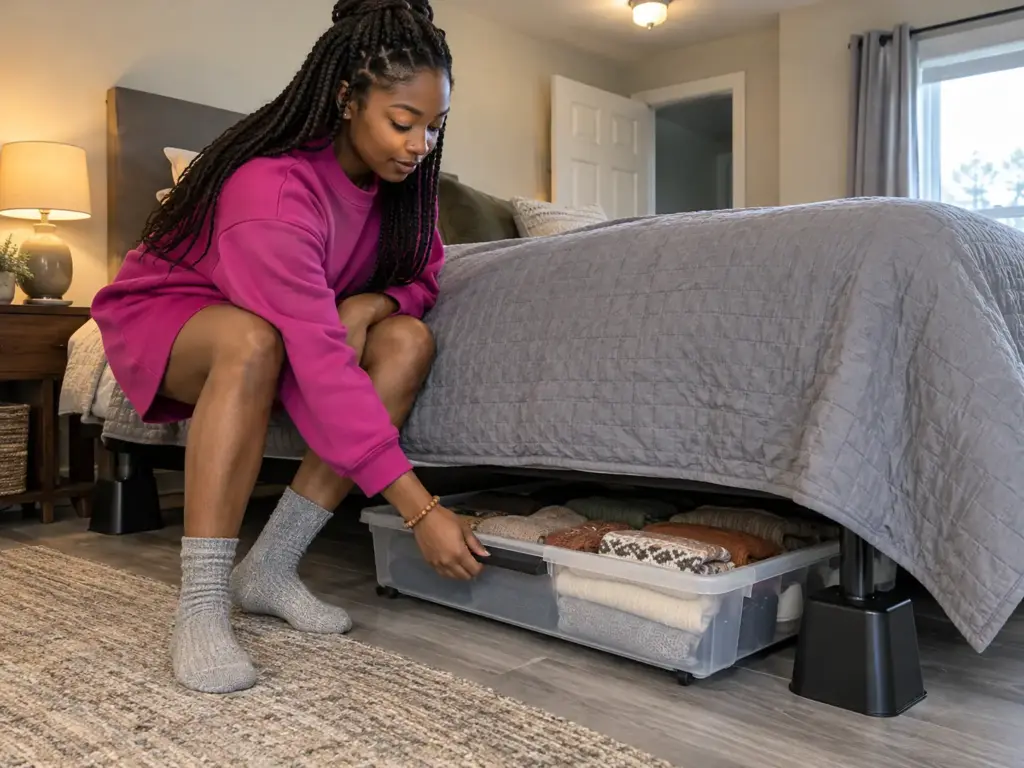
What the space under a bed can hold
Flat rolling bins beat tall ones, because the bin has to slide out. Seasonal clothes, spare bedding and shoes in flat boxes are the natural contents. Carpet drags a bin and vinyl plank lets it glide, so floor type decides whether wheels are worth having.
Risers and the height they add
Risers lift the bed on its legs, and the frame has to sit stable on them. The EclatBain bed risers come as a set of four with adjustable heights. Read the heights on the listing against the clearance your bins need and decide from that comparison; the height you want is the one you measured, not the one you hoped for.
When the bed frame decides for you
Slats, a box spring or a platform base can all rule risers out. Check the legs: they need a flat, solid foot to sit in the riser, and a platform bed with a continuous base has no legs to lift. Storage ideas for a studio tend to fail by month three when the bed moves and the system does not, so test that the bin still slides after a week.
Surface Rules: Painted Drywall, Wallpaper, Tile, Laminate and Hollow Doors
One product pack says it works on “most surfaces,” and four different surfaces sit within arm’s reach of the same apartment door. Each surface fails differently, so surface damage has to be judged one surface at a time.

Painted walls and wallpaper: the layer that comes off
On painted drywall, the paint is the weak layer, and a cheap coat lets go first. Wallpaper is worse: the paper itself lifts, so an adhesive that holds perfectly well can still tear the covering off. Test before committing anything to either.
Tile and slick laminate: where adhesive and friction slip
Tile is smooth and non-porous, so only a product made for water and tile will grip it. The Command large water-resistant adhesive strips, sold in a pack of 16, are the kind made for that job. The pack is strips only, so check what attaches to them before you order.
The same pull-down removal rule applies: pulling straight out takes the wall with the strip. For a shower, a tension shower caddy, which stands on a pole held by pressure, needs no adhesive, and shower caddies that suit rentals show which ones need none.
Slick laminate, such as a cabinet side, is the other trouble spot. Friction grips poorly and adhesive may hold or may not, and a guess either way is a gamble.
Hollow-core doors and frames
A hollow-core door has a thin skin and no core to hold a screw, which is why nothing is driven into it in a rental anyway. Over-door organizers rest on the top edge instead, and the mechanism is the whole story: spread the load, keep it low.
The test spot
Put one hook in the least visible place, such as the inside of a closet, and leave it up for a week. Then take it off the slow way. If it leaves a mark, that product fails for that wall, and you learned it where nobody looks.
Where the mechanism is uncertain, the advice does not change: test a small spot first. A fresh coat of paint may also need time to cure before an adhesive goes on, so check the pack for its guidance on new paint and follow that, not the shortest route.
How the Load Adds Up Across a Rod, a Door and a Row of Hooks
Read “holds up to” on one pack and the easy mistake is to fill the whole wall with that number. The rating belongs to one product on a good surface, and the load belongs to the whole row. Nobody adds the two, and that is where the surprises come from.

The rating belongs to one product, the load belongs to the whole row
A pack’s load rating, its stated weight limit, assumes a clean mount on an ideal surface. A rental wall is not a test bench, and the adhesive is only part of the story, because the paint underneath is carrying the load too. A number from one pack tells you nothing about your wall or your coat.
A simple tally before you hang anything
This is the method this guide uses, and it is ours, not a standard. List what goes on each fixing. Estimate each item, weighing it in your hand or on a bathroom scale.
Add them up, and compare the total with the figure on the pack for that fixing. But a bag of groceries, a stack of jeans and a coat with wet sleeves all weigh more than they look, so weigh them for real.
Then add the pieces. A rod in a cabinet carries everything hanging from it. A row of hooks carries what is on all of them, and an over-door organizer carries every pocket at once. The sum is what the fixing sees, not the weight of the heaviest single item.
When the sum says “use the floor”
If the total is more than a pack’s rating gives you comfort for, the answer is not a stronger sticker. One heavy thing belongs on the floor: a bookcase, a cart, a freestanding shelf. That is the free-first answer and also the safest one. For a closet where the load piles up quickly, a no-drill closet that holds its load without drilling shows how to split the weight between a rod and the floor.
What to Measure Before You Buy: Opening, Door, Cabinet and Gap
A rod that is too long, a hook that does not clear the door and a shelf that blocks the window all come from buying by the picture. A tape measure and four numbers prevent all three.

The four numbers to write down first
This is a method of ours, not a standard. Write down the width of the opening, the thickness of the door, the depth of the cabinet or shelf and the gap beside any appliance. Keep them in a note on your phone. Shopping starts from the list, not the other way round.
How to measure each one
Measure where the space is narrowest, not where it is easiest to reach. Door thickness is the edge of the door at the top, where an organizer hooks over it; the Umbra example earlier is listed for doors up to 1.5 inches, and a thicker door has no fit with it. Cabinet depth is measured to the back wall or the first obstacle, whichever comes first. Read each product’s listed size against these numbers, not the other way round.
The one that people skip
Clearance. A door has to swing, a drawer has to pull out, a cart has to roll free. A product can fit the opening and still fail because of what it blocks. Check the swing of the door and the reach of the drawer before the order goes in.
Order of work: measure, shortlist, then order. Keep the return window in mind as a backstop, but do not count on it. A product sent back is a product you waited for twice.
A Budget Ladder: Cheap Removable Options Against the Piece Worth Moving With
A roundup shows a boutique piece, and the plain version looks nearly the same. Sometimes it is. The ladder has three rungs, and the money belongs on the rung that bears weight or has to survive a move.

What the cheap version does
For a wall, the cheap removable option does most of the job. A plain bin holds what a pricey one holds, and an adhesive hook holds a coat the way a heavier one does. The saving here is real: the budget-friendly pick is a cheap alternative that does most of the job for anything that stays on the wall or sits on a shelf. Most of the job, not all of it, since a cheap hook still asks the same question at move-out.
What the pricier piece adds
The solid piece holds as well, and looks better. It also moves with you. A solid wood leaning shelf survives several apartments, while a pack of stickers survives one. My judgment is that the money goes to the thing that bears weight or has to leave with you, and not to a wall fixing that is coming off anyway.
The piece that is worth packing
The pieces worth moving with are modular furniture and other portable storage: a bookcase, a leaning shelf, a rolling cart. The pieces that stay are adhesive anything. Roundup picks that cost a lot, such as beds and sofas, are furniture and not organization, so skip them in this category. A closet system made for renters is the middle rung, and a comparison of closet systems for renters that leave no holes shows what that rung looks like.
What Stays on the Wall at Move-Out: Residue, Photos and the Deposit
The inspection is on Saturday, and the wall that held a hook for a year and a half looks clean from across the room. Up close it may not. The move-out is where every earlier choice gets graded, so the order of work matters.

The removal order that protects the paint
Take the shelf off before the hook, because the shelf pulls on more paint. Warm each strip, slide the tab straight down and go slowly. If a blemish remains, a matching paint chip and a dab of paint usually fixes it, and that costs far less than a repainting charge.
Photograph the apartment twice
Take a set of photos before the first item goes up and a second set at move-out, including inside the cabinets and under the sinks. UCF Student Legal Services’ security deposit tips advise both sets, and tell tenants to get and keep a copy of any move-in inspection. According to UCF Student Legal Services, “Don’t rely on your landlord to retain a copy.”
The Student PIRGs’ guide advises video or photos at the walk-through with the landlord. According to the Student PIRGs’ renter guide, “The more photos, the better.” It also advises reading the lease carefully and getting any promise from the landlord written on the lease before signing.
Photograph every wall before the first hook goes up, with the date on, and store the files somewhere that is not your phone alone. The same photos prove which marks were there before you.
The deposit clock
The deadlines depend on where you live. In the UCF document, written for a Florida context, the landlord must notify the tenant in writing within 30 days of an intent to keep all or part of the deposit, and the tenant must dispute that claim in writing within 15 days of receiving it. Other states differ, so read the rule for your own state and put your move-out date and your forwarding address in writing.
Sort by What It Leaves Behind, Then Test One Hidden Spot
No-drill organization is a sorting job. The fixes fall into three families: the ones that touch the wall, the ones that press on a frame, and the ones that touch nothing. Sort every idea by what it leaves behind, test one small spot first, add up the load before you hang it, measure the opening, the door and the gap before shortlisting, and keep the photographs from day one. The less a fix touches, the less there is to repair.
For the later check, look at the test hook after a week, then look at the whole apartment in the days before the move-out inspection, while there is still time to warm a strip, slide it down and touch up a spot.
Today, photograph the walls as they are, and pick the most hidden spot in the apartment for one test hook. Notice what it leaves behind after a week; that is your answer for the rest of the walls.
The same rules carry over to other small places. The studio apartment guide applies them when one room does every job, the dorm room guide handles walls with strict rules about what can be stuck to them, and the RV and tiny home guide covers the places where every inch has to move.
Frequently Asked Questions
01What does rental-friendly organization mean?
It means storage that uses no screws, nails or anything else the lease forbids, and that comes off at move-out without taking paint with it. Adhesive, pressure and floor-standing fixes all qualify, and each leaves a different trace.
02How do you organize a rental on a budget?
Start with the floor and with shoe boxes, a spare curtain rod and a bookcase you can move. Add bins and one freestanding shelf before any adhesive product, because the floor-standing pieces cost nothing to remove and move with you.
03How can you organize rental drawers without drilling?
Loose inserts and dividers sit in the drawer with nothing fixed to it, so they leave nothing behind. Measure the drawer’s inside width and depth first, then pick trays that fit it without a gap that lets them slide.
04How do you take an adhesive strip off without pulling the paint?
Warm the adhesive with a hair dryer for a few seconds, then slide the tab straight down, parallel to the wall, slowly. Pulling it out toward you is what lifts the paint.
05What should you photograph before you put anything up?
Photograph every wall, plus the inside of cabinets and under the sinks, and keep your own copy of the move-in inspection. Take the same set again at move-out so the two can be compared.
Disclaimer: ClutterlessNest is a participant in the Amazon Services LLC Associates Program. As an Amazon Associate we earn from qualifying purchases. This article may contain affiliate links — if you buy through them, we may earn a small commission at no extra cost to you. We only recommend products we have tested or genuinely believe in.