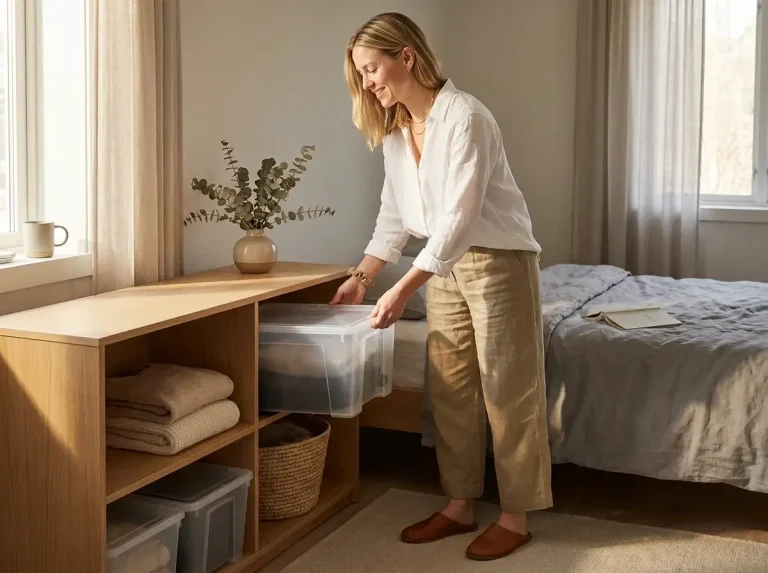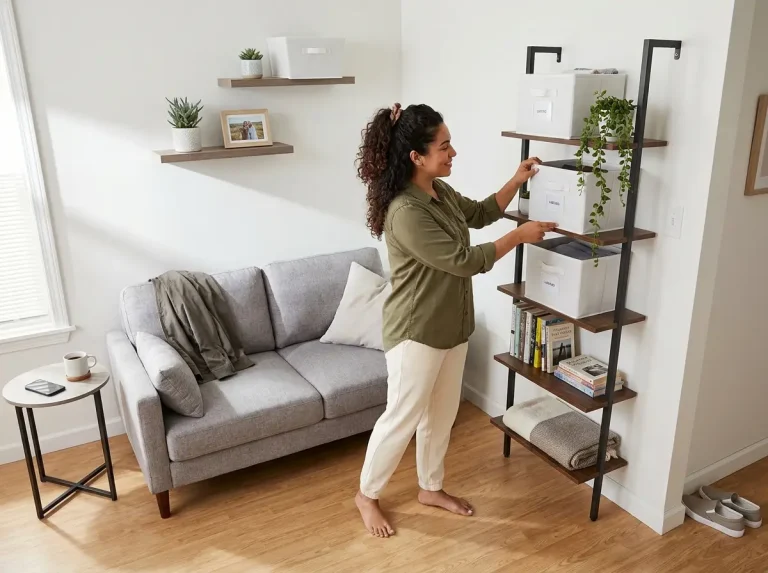
You bought the matching bins. You labeled them. You took the photo for Instagram. And three weeks later, those same beautiful bins are full of the exact stuff that was cluttering the counter, just contained behind a nicer front. That’s the bin trap, and almost everyone falls into it once. The fix is almost never another bin, and the order you do things in matters more than anything you can buy. Here’s the full minimalist home organization system that actually survives daily life, room by room, including the parts no other guide covers: renters who can’t drill, and homes where you’re not the only one living there.
Quick Answer
Minimalist home organization works in one order — reduce first, contain last.
- Declutter before you organize. Never buy bins for clutter you haven’t cut.
- Give every item one fixed, named home.
- Store by use, keeping daily items in easy reach.
- Add containers last, and only what already fits.
- Run a short daily reset to stop clutter creep.
Declutter First, Because Bins Can’t Fix Clutter

Everyone wants to start with the fun part, the containers. It feels productive. You come home with a stack of matching bins, you fill them, and the room looks calmer for a little while. But you didn’t organize anything. You relocated it. This is the single reason minimalist home organization falls apart, and it’s the reason so many people end up redoing the whole project a few months later. If your system keeps reverting, it’s usually because you skipped this step the first time around, the same pattern behind minimalist systems that quietly revert by month three.
Why Buying Bins First Makes You an Organized Hoarder
There’s a term that floats around organizing communities: the “organized hoarder.” It’s the person who owns labeled bins for everything and still has too much stuff. The bins didn’t reduce anything. They just gave the excess a tidier address. Professional organizers describe the same thing as the container concept, the idea made popular by Dana K. White: a container is a decision-making tool, not a storage tool. When the bin is full, the bin is telling you to decide what leaves, not to go buy a bigger bin.
That reframe changes everything about how you shop. You stop asking “what can hold all this?” and start asking “what actually earns a spot?” And honestly, once you internalize it, walking the storage aisle feels different. You’re no longer trying to buy your way out of a problem that shopping created.
Leave the bins in the store on your first trip. Reduce the whole category first, then measure what’s left, then buy. You will almost always need fewer containers than you thought, and they’ll be smaller.
The Reduce-First Sequence
Work one category or one room at a time, never the whole house at once. Pull everything in that zone out, then do a fast four-box pass: keep, relocate, donate, toss. The speed matters more than the perfection. Decision fatigue is real, and it sets in faster than people expect, so you want to move briskly while your judgment is fresh. A reduce-first pass that you can repeat without dread is worth more than a flawless one you’ll never do again, which is the whole point of a reduce-first approach that actually sticks.
If watching it done helps more than reading about it, this full-house walkthrough narrates the decisions in real time:
How Much to Remove Before You Start Organizing
The target isn’t “minimalist.” The target is “fits with room to spare.” When what’s left sits in the space with breathing room, when you can see the back of the shelf, when nothing has to be double-stacked or wedged, you’ve reduced enough. You don’t have to own ten things. You just have to own what fits the home you actually have. That’s a much kinder bar to hit, and it’s the one that holds.
Give Every Item One Fixed Home
Here’s the thing about the jacket on the chair and the mail on the counter: that isn’t laziness. It’s a missing address. When an item has no fixed home, the nearest flat surface becomes its home by default. Name that failure honestly and the solution gets obvious. Every item needs one specific place to live, and that place has to be obvious to everyone in the house, not just the person who set it up.
What “A Home” Actually Means
A home is specific and fixed, not “somewhere in this drawer.” “Near the door” is not a home. “The left hook by the door” is. The more precise the location, the less thinking it takes to put something back, and the less thinking it takes, the more likely it happens on a tired night. According to the National Association of Productivity and Organizing Professionals (NAPO), the backbone of a working system is exactly this: one home for everything, like stored with like, and something leaving when something new arrives.
Group Like With Like
Categories make the home intuitive instead of a memory test. All the batteries in one spot. All the chargers in one spot. When related things live together, you stop buying duplicates of stuff you already own but can’t find. It’s also the only real cure for the junk drawer, that everything drawer where uncategorized odds and ends go to disappear. This is also what makes a space teachable, because a guest or a kid can guess where something goes without asking.
Make the Home Visible
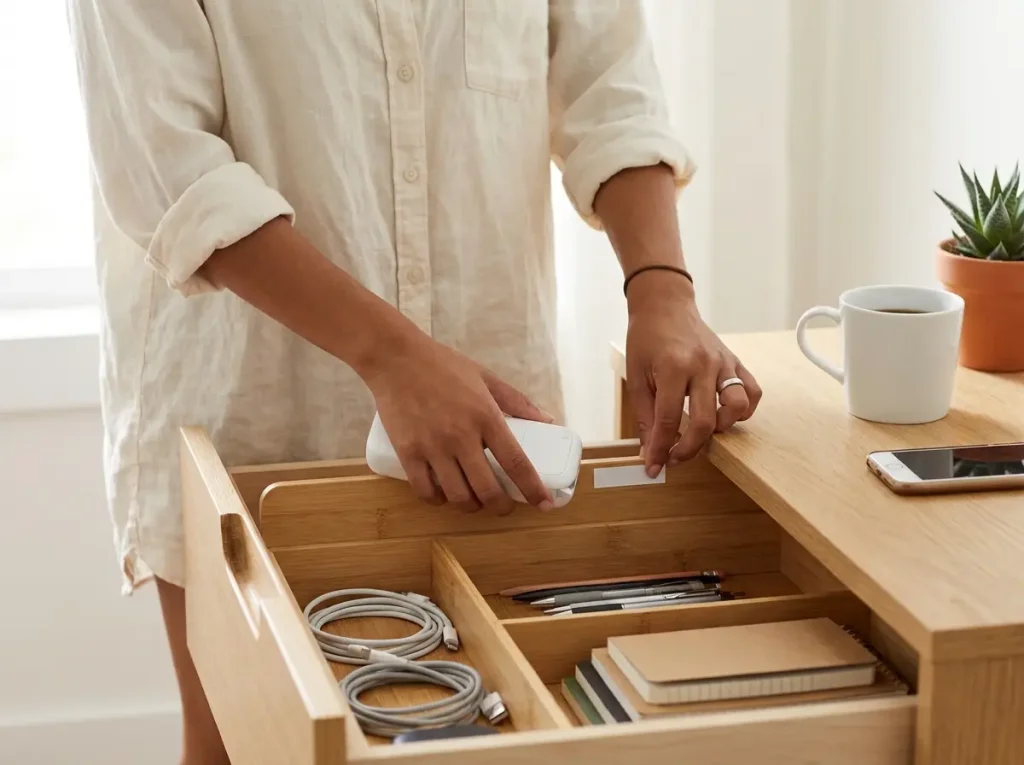
A home that only exists in your head isn’t a household system, it’s a personal one, and it collapses the moment someone else needs to find or return something. Labels fix that. They turn “I didn’t know where it went” into a non-excuse. You don’t need anything fancy here. Chalk labels or a marker on painter’s tape work for almost nothing, and that’s genuinely where I’d start. If you want labels that hold up to handling and look consistent across rooms, the Brother P-Touch PTD220 Label Maker is a compact handheld unit that prints durable strips, and the consistency is what makes a shared system click. Its only real downside is that it’s another gadget to store, so skip it if tape does the job for you.
Label the shelf edge, not just the bin. When the bin gets borrowed and put back in the wrong spot, the shelf label tells everyone where it belongs. The label stays put even when the container wanders.
The One-In-One-Out Rule (and the Failure Nobody Warns You About)
Everybody repeats “one in, one out.” Almost nobody explains why it quietly dies. And it does die, predictably, in the same few ways every time. The rule itself is sound: when something new comes in, something comparable goes out, so your total never creeps upward. The problem is that the rule has no built-in enforcement, and real life is very good at skipping rules that don’t enforce themselves.
How the Rule Actually Works Day to Day
The “out” has to happen at the moment of the “in,” not “later.” Later is where the rule goes to die. You buy the new sweater, you remove an old one right then, before the new one even gets hung. The discipline isn’t in the buying, it’s in the same-day removal. Get specific about it and the rule has teeth. Leave it vague and it’s just a nice idea you’ll abandon by spring. This is exactly where the one-in-one-out rule breaks down for most people.
The Failure Modes Nobody Warns You About
The first failure is decision fatigue. It’s 9 PM, you’ve had a ten-hour day, and the “out” decision feels like one more thing. So you skip it once. The problem isn’t the one skip, it’s that the rule, once broken, rarely restarts on its own. The second failure is the missing staging zone. If there’s no donation basket or action basket by the door, the thing you decided to remove has nowhere to go, so it sits on a chair, then migrates back into circulation. The third failure is that the rule needs a trigger to mean anything, and the best trigger is a full container. When the bin is full, that’s the signal to remove, which loops right back to the container concept.
I used to tell people to just commit to the rule harder, as if willpower were the missing ingredient. After watching it fail the same way over and over, I changed my advice completely. The fix is never more discipline. It’s removing the friction so the rule survives a bad day, because the rule only matters on the bad days.
These false beliefs about why systems fail get unpacked well here:
The Backwards-Hanger Version for Clothes
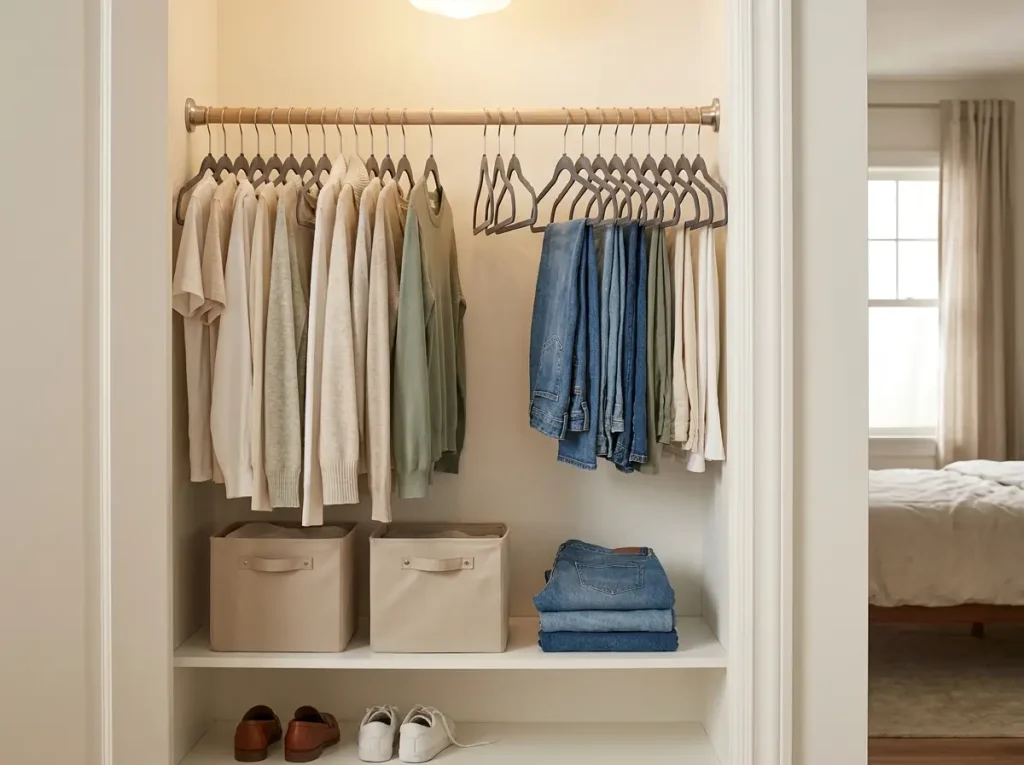
For wardrobes, there’s a version of this rule that runs itself with zero cost. Turn every hanger backward, hook facing out, at the start of a season. When you wear something and rehang it, you flip the hanger the normal way. At season’s end, every hanger still backward is a garment you didn’t touch, and that’s your “out” list, already sorted for you.
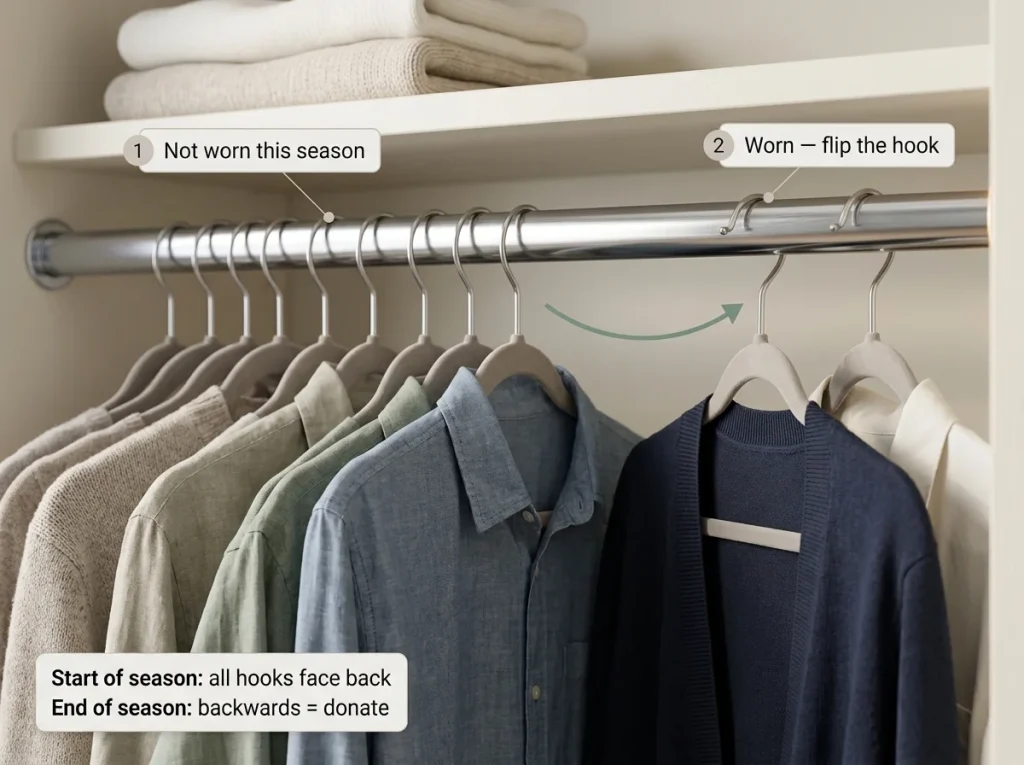
It costs nothing, it requires no app, and it removes the hardest part of decluttering clothes: the guessing. You’re not deciding whether you “might” wear it. The hanger already told you that you didn’t.
Store by Use, Not by Looks
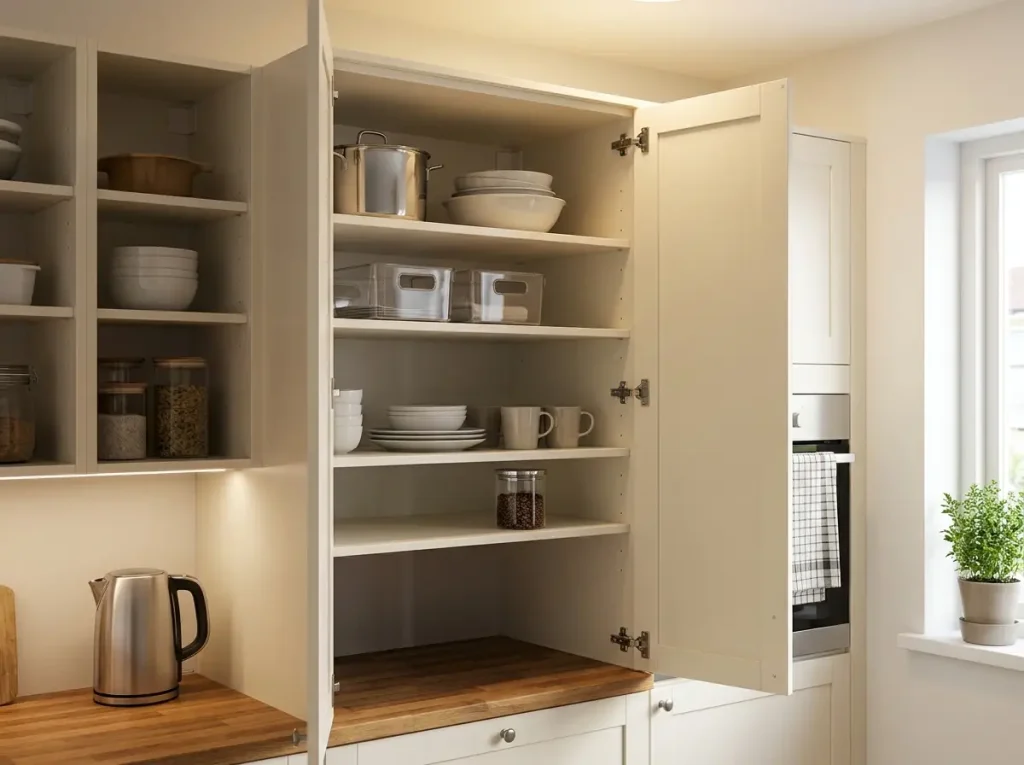
The prettiest setup in the world fails if the thing you reach for every morning lives on the top shelf behind two other bins. Function decides where something lives. Looks come after, never before. This is the rule that separates a system that lasts from a magazine photo that lasts about a week.
The Prime Real Estate Rule
The zone between your eyes and your knees is prime real estate. That’s where daily items go, full stop. Things you use once a month go high or low. NAPO-aligned organizers put it simply: the front of the most reachable shelf is the best storage real estate you have, so don’t waste it on the waffle maker you use twice a year. Put the everyday plates and the daily mug right at the front edge where your hand lands without thinking.
Proximity Storage
Store it where you use it, not where it “logically” belongs. Coffee lives by the kettle, not across the kitchen in the cabinet that happens to hold the other drinks. Trash bags live near the can. It sounds obvious, and yet most kitchens are organized by category alone, which is why you’re always walking three steps for the thing you use most.
The conventional advice is to group like with like everywhere, and most of the time that’s right. But when “like with like” fights “store where you use it,” let proximity win. The system you don’t have to think about is the system that survives.
The Deep-Shelf Dead Zone
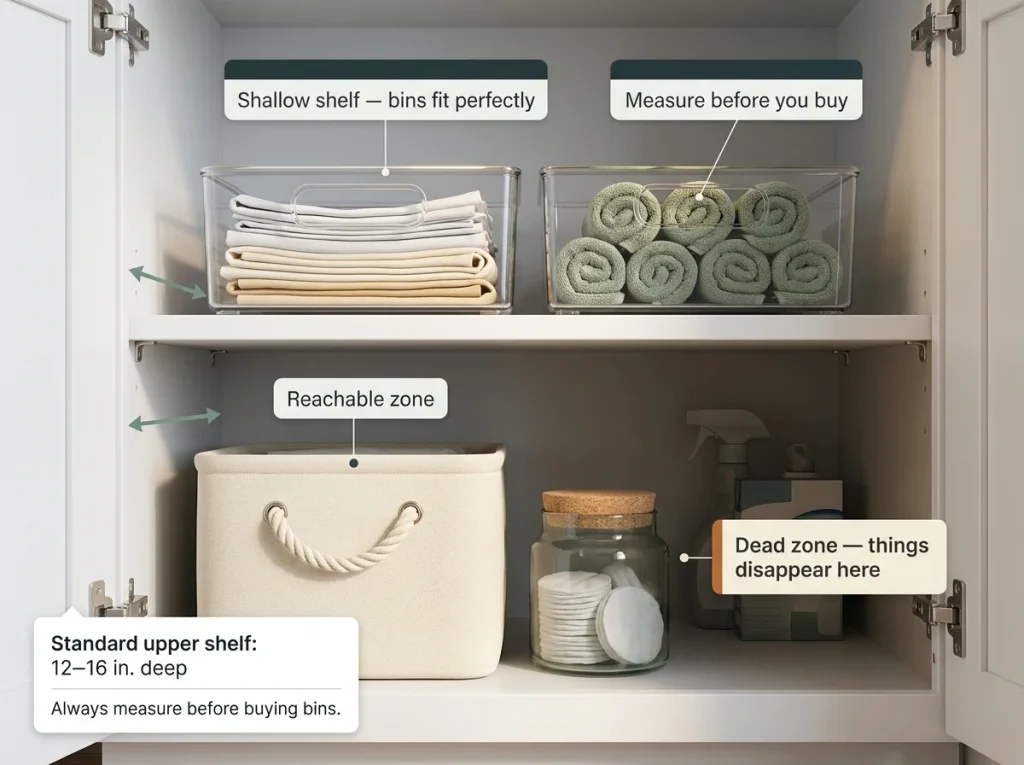
Standard lower cabinets run deep, and the back third is a zone you’ll never comfortably reach. Things go in there and effectively disappear, which is how you end up with three open jars of the same spice. Plan for it instead of losing things in it. Use the back for true backstock or seasonal items, keep the reachable front for daily use, or pull the whole shelf forward with a single bin you can slide out. The same logic pushes you to go vertical before you give up the floor when you’re short on reachable space.
Add Containers Last, and Only What Fits
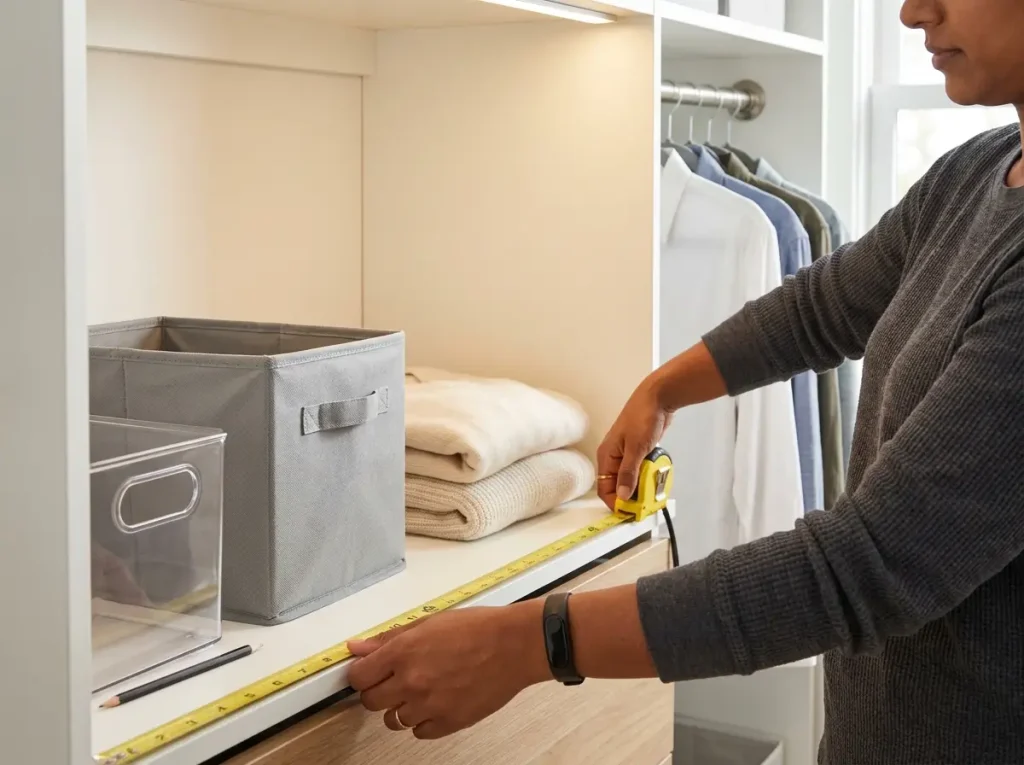
Now, finally, the bins. Containers aren’t the enemy. Buying them first is. Once you’ve reduced and given everything a home, the right containers lock the system in place and make it look calm. But you measure before you buy, every single time, because a bin that doesn’t fit the shelf is just expensive clutter with a lid.
Measure Before You Buy Anything
Pull out a tape measure before you pull out your wallet. Standard upper cabinets are shallow, deep enough for two small bins side by side and not much more. Closet shelves vary, and according to Angi’s building guide, standard closet shelf depth runs about 12 to 16 inches, so a bin sized for one closet won’t necessarily fit another. Always leave an inch or two of wiggle room so you can actually slide the bin in and out without a fight.
What’s Worth Buying
Buy the fewest containers that do the most. Before you buy anything, shop your house first, because half-empty bins probably already live in a closet you forgot about. When you do buy, a single set of stackable bins can cover a pantry shelf, a closet shelf, and a bathroom cabinet, which keeps the look consistent without buying three different things. The mDesign Stackable Plastic Storage Bins come in a four-pack that fits standard shallow shelves and stacks cleanly, and one pack genuinely stretches across multiple rooms. They’re clear, so they fight the out-of-sight-out-of-mind problem, though that same clarity means they show dust, so they’re better in cabinets than out in the open.
For closet shelves specifically, soft-sided bins earn their keep. The Fabric Storage Bins with Labels come as a collapsible set of six, and the collapsing is the feature, because when you empty one it folds flat instead of taking up shelf space doing nothing. They’re renter-safe on any shelf and gentle on painted surfaces. The tradeoff is structure: fabric sags under heavy or oddly shaped items, so keep them for soft goods like linens and folded clothes rather than canned goods.
What to Repurpose Instead
A glass pasta sauce jar, washed out, is a perfect drawer organizer for pens or cotton swabs. A shoebox cut down makes a free drawer divider. Dollar-store clear bins do the same job as the premium ones for a fraction of the cost in spaces nobody sees. The anti-sell here is real: if you already own something that contains the thing, you’re done. Don’t buy a solution to a problem you’ve already solved with a jar.
Skip single-use organizers that fit one product and nothing else. The specialty rack built for one appliance becomes useless the day you replace that appliance. Generic, rectangular, and stackable beats clever and specific almost every time.
Stop the Hotspots Before They Refill

You can build a flawless system and still find the entryway table buried by Friday. That’s not a personal failure, it’s physics. Daily life generates incoming stuff, and any flat surface near the door will collect it. The fix isn’t more willpower. It’s a ritual and a boundary.
Find Your Landing Zone
Every home has a landing zone, the surface everything defaults to on the way in. Usually it’s the entryway table or the kitchen counter just inside the door. Clutter creep happens here first, a slow daily accumulation that’s invisible in the moment and very visible in a month. This is where surface clutter is born, and where visual clutter quietly takes over once you stop noticing it. The other thing that happens here is clutter blindness: the pile sits long enough that you stop seeing it. Naming the zone is step one, because you can’t manage a hotspot you’ve gone blind to.
The Arrival Ritual
Give the daily incoming a place to land that isn’t the open counter. Keys go in a small tray. Mail goes in an upright sorter, sorted the day it arrives, not “this weekend.” Bags go on a hook. When every daily object has a designated catch, the surface stops being the catch. A no-drill landing zone by the door handles the single biggest hotspot in most homes, and it’s the highest-leverage thing on this whole list.
The Weekly Reset
Some things will always slip through, so build in a short weekly reset to process whatever did. Ten minutes, same day each week, walk the hotspots and clear them back to baseline. Keep it short on purpose, because a ten-minute reset survives a tired week and an hour-long one doesn’t. The reset isn’t about deep cleaning. It’s about catching clutter creep before it compounds.
Make It Work as a Renter (No Drill, No Damage)
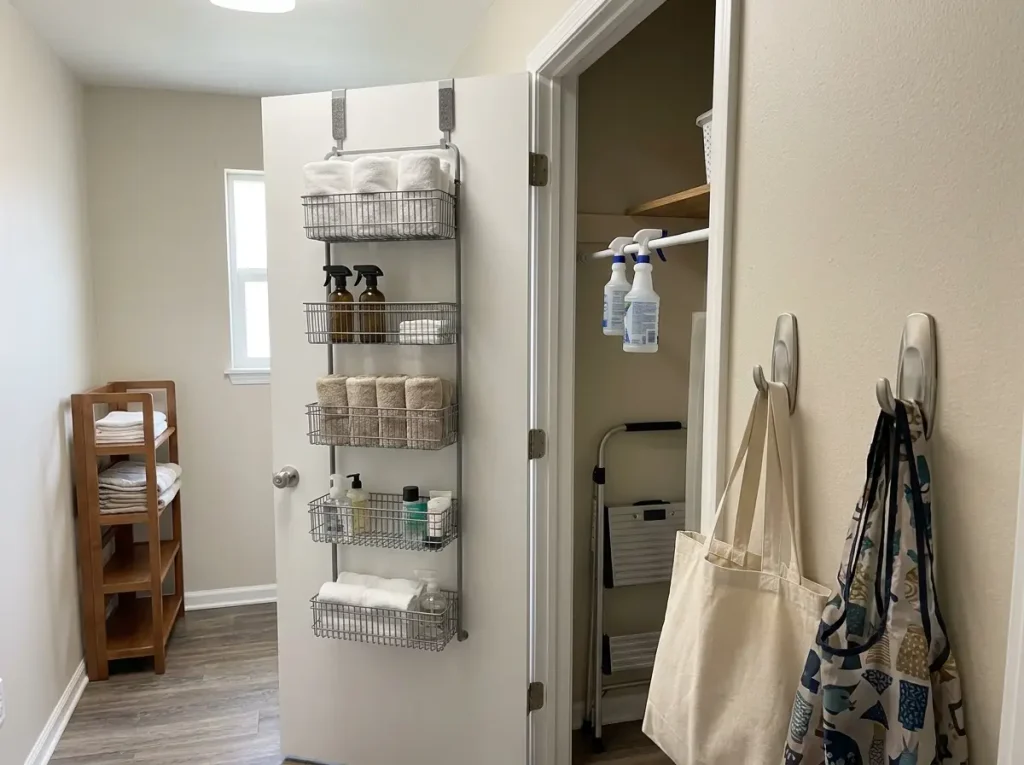
Here’s where almost every minimalist guide quietly assumes you own the place. They tell you to install shelving, mount the rail, anchor the system to the studs. If you rent, none of that is on the table, and pretending otherwise is useless. Good news: you can build this entire system without putting a single hole in a wall. You just have to know which removable solutions actually hold, and which ones fail at 2 AM.
Doors Are Free Storage Walls
Every door in your place is an untouched storage wall, and using it costs you nothing in wall damage. An over-door organizer hangs from the top edge and gives you a full column of storage with zero contact with the wall itself. The SimpleHouseware Over-The-Door Organizer is a five-tier wire unit that fits a standard interior door and holds cleaning supplies, toiletries, or pantry overflow in plain sight. On a hollow-core door, add the felt pads it comes with so it doesn’t rattle or scuff, and don’t load the top tier with anything heavy or the whole thing tips its balance forward.
Know Your Weight Limits
The single most common renter mistake is overloading adhesives, and it always ends with a hook on the floor and a strip of paint missing. So learn the real numbers before you hang anything. Adhesive hooks and Command strips hold a light load, tension rods hold a modest one, and peel-and-stick shelves hold the least of all, just a few light items. A Command Large Wire Hook holds a bag, a hat, or a set of keys beautifully, but it will not hold a heavy winter coat, and asking it to is how you get the 2 AM crash. Matched to the right load, these are the most useful renter tool there is, and the multi-pack lets you set up a whole entryway. The honest caveat is the ceiling: respect the weight limit on the package and they hold for years; ignore it and they fail fast.
A tension rod under the sink is the cheapest renter upgrade there is. Spring it between the cabinet walls and hang spray bottles by their triggers, and you’ve created a whole second shelf of floor space for a few dollars and zero holes.
Freestanding Beats Mounted
When you can’t mount, go freestanding. A narrow standing shelf tucks into a bathroom corner or a kitchen gap, and a cube unit replaces a built-in closet system entirely. The best part for renters is that it all moves out with you, no spackle, no deposit risk, no awkward conversation with the landlord.
In the closet, the highest-impact no-drill move is a second rod that hooks over your existing rod and hangs a tier of clothes beneath it, instantly doubling your hanging space without a single screw. It works because it borrows the support the builder already gave you. In the bathroom, a freestanding over-the-toilet shelf claims the dead vertical space above the tank that renters almost always waste, and a slim rolling cart slides into the narrow gap beside the toilet where nothing else fits, then rolls out when you need what’s at the back. None of it touches a wall, and all of it comes with you. For the closet specifically, there are no-drill closet setups that won’t cost your deposit built entirely from freestanding and over-rod pieces.
When You Share the Space (Partner, Roommate, Kids)
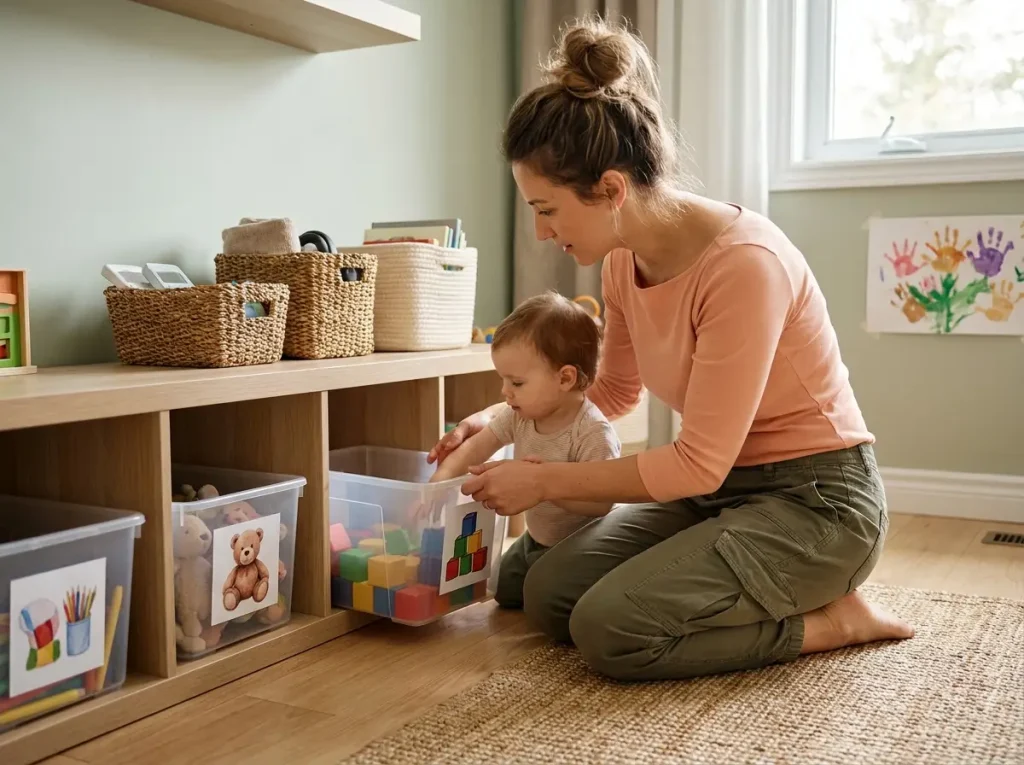
The entire minimalist organization genre is written for a solo adult with total control over the space. Real homes rarely look like that. There’s a partner who puts the scissors back in the wrong drawer, a roommate with different standards, a four-year-old who can’t read a label. This is the number one reason systems collapse, and it’s the part no competitor will tell you about. The good news is it’s a design problem, not a people problem, and design problems have solutions.
The Collapse Pattern
Here’s how it goes wrong. One person builds the perfect system. The others can’t find anything because the logic only lives in the builder’s head. The builder starts correcting everyone, the others start feeling managed, and within two or three months everyone’s quietly stopped cooperating and the system is back where it started. If the friction is specifically about someone holding onto too much, when your partner’s stuff is the sticking point is its own conversation worth having first.
Co-Design the System Before You Build It
A system imposed on someone is a system they will fight, even passively. So design the category logic together, before anything gets set up. Where do WE think the keys should live? Which shelf makes sense for the snacks? When people help decide, they actually use it, because it’s theirs too. This one shift prevents most shared-space collapses before they start.
The Container Agreement
The cleanest peace treaty for shared stuff is the container agreement: each person gets their own container for a category, and each person manages their own. When your bin is full, you decide what leaves, not your roommate, and not through nagging. It builds accountability without anyone playing clutter police. For a shared closet, the same principle means you split a shared closet so both people can actually find their things, with clearly independent zones.
And accept that people are simply wired differently. One person feels calm with everything visible in open bins; another needs it all behind a closed door, or the whole room reads as noise to them. A shared system that forces everyone into matching open baskets loses to one that lets each person store their own way, as long as the shared zones stay agreed on. Roommates need this even more than couples, because you’re not blending one life, you’re drawing a fair border between two. Give each person a zone that’s fully theirs, with no shared rules inside it, and the common areas get a lot less tense.
Kids and Picture Labels
A four-year-old can’t read “Legos,” but they can match a picture. For kids, use clear bins with picture labels, a photo or a simple shape, set at the child’s reach height, not yours. When a kid can see what’s inside and knows where it goes without help, they actually put things away, and you stop being the only person in the house who maintains the system. Teach it with a quick five-minute tour rather than expecting it to be obvious, because what’s obvious to you isn’t obvious to a person who’s three feet tall.
One more thing about kids: resist the urge to make their system look like yours. The goal isn’t a tidy shelf for the grown-ups to admire, it’s a four-year-old who can put the blocks away alone. That means fewer categories, bigger bins, pictures over words, and reach height over symmetry. A system a child can actually run by themselves is worth far more than one that looks polished and only you can keep up.
Conclusion
The whole system comes down to three moves. Reduce before you contain, because no bin fixes clutter. Give every item one visible home, so putting things away takes no thinking. And build a short daily reset, so the system survives the tired Tuesdays that break every other approach. Do those three and the rest is detail.
In three months, walk your home and notice which container is overflowing. That’s not a sign you need a bigger bin. It’s the system pointing you exactly to where the next edit belongs. The overflowing container is doing its job, telling you what to reduce next.
Start with one drawer. Reduce it, give everything a home, and skip the bin if you don’t need it. Then move to the next one. The system that lasts isn’t the one you build in a perfect weekend. It’s the one you can keep building, one drawer at a time, on an ordinary day.
Frequently Asked Questions
01Should I declutter before buying storage containers?
Yes, always. Buying bins first just contains clutter you haven’t decided to keep. Reduce the whole category first, measure the space, then buy only what fits what’s left.
02How do I start minimalist home organization when I feel overwhelmed?
Start with one drawer, not the whole house. Reduce it, give each item a home, and skip the bin until it’s done. Small wins build momentum, and a one-drawer start when the whole house feels like too much is the proven way in.
03How do minimalists handle sentimental items?
Keep the ones that genuinely matter and give them a real home, not a random box. The rule isn’t own nothing, it’s own on purpose. A smaller set you actually display beats a bin you never open.
04Why do my surfaces keep filling up after I organize?
Because the daily incoming has nowhere to land. Set a tray and a fixed key and mail home so objects have a catch that isn’t the counter, then run a ten-minute weekly reset to clear whatever slips through.
05How do I keep a minimalist system working with a partner or kids?
Co-design the categories together and use picture labels for young kids. A system imposed on someone collapses, a system shared survives. Give each person their own container and let them manage it.
Disclaimer: ClutterlessNest is a participant in the Amazon Services LLC Associates Program. As an Amazon Associate we earn from qualifying purchases. This article may contain affiliate links — if you buy through them, we may earn a small commission at no extra cost to you. We only recommend products we have tested or genuinely believe in.